Get to Know Your New
Splendor Blender®
Make the most of your new appliance by getting to know it a little better.
Recipes
Everything You Need to Know
Refer to the Splendor Blender user manual for best practices and important safety details.
FAQs / Troubleshooting
The Splendor Blender's control panel is equipped with a multifunctional LED light, providing visual cues for optimal operation. When the light is off, it indicates that the appliance is not plugged in. A flashing white light signals that the appliance is plugged in, but the Blade Base and/or Blending Vessel is not correctly installed. A solid white light indicates that the appliance is ready to blend, while a flashing red light signifies a motor stall or overheating. In such cases, users should remove the Blade Base and Blending Vessel from the Blender Base. A solid red light indicates a product failure, and users are encouraged to contact hello@fromourplace.com for assistance.
The Blend Mode, represented by a circle with one dot, initiates a 45-second blend cycle with a single press and stops the motor when pressed again. On the other hand, the Pulse Mode, symbolized by a circle with a squiggle line, allows users to engage in quick short pulses or continuous blending for efficient ingredient breakdown. The motor operates only when the button is pressed and stops upon release. The Off Mode, identified by a circle with a smaller circle inside, stops blending and transitions into standby mode with a solid white LED light, providing users with versatile control over their blending experience.
Begin by plugging the power cord into an outlet, noting the flashing white LED indicator.
Fill your chosen blending vessel, ensuring ingredients don't exceed the MAX line. Seal the vessel by placing the blade base on top, turning clockwise.
Secure the vessel on the blender base by twisting clockwise until you hear a click, signifying the interlock is engaged. The LED light will turn a solid white light. Press the “Blend” button for a 45-second blend cycle. Stop at any time by pressing the button again. Press the “Pulse” button in short pulses for quick ingredient breakdown. Alternatively, you can also press the “OFF” button to stop blending.
Begin by plugging the power cord into an outlet, noting the flashing white LED indicator.
Fill the Pitcher with ingredients, ensuring they don't exceed the MAX line. Attach the pitcher lid with the vented lid cap onto the pitcher.
Secure the vessel on the blender base by twisting clockwise until you hear a click, signifying the interlock is engaged. The LED light will turn a solid white light. Press the “Blend” button for a 45-second blend cycle. Stop at any time by pressing the button again. Press the “Pulse” button in short pulses for quick ingredient breakdown. Alternatively, you can also press the “OFF” button to stop blending.
Liquid may also be added through the lid vent during blending. After the ingredients are lightly blended, remove the lid vent and slowly pour liquid directly into the pitcher. Remember to place the lid vent back on to prevent the ingredients from splashing out. Never blend hot ingredients or carbonated ingredients.
When using the 450mL blending vessel (available separately), ensure a maximum fill volume of 300mL during blending. The 750mL blending vessel, included in the main configuration or available separately, accommodates a maximum fill volume of 500mL. For the larger Pitcher (sold separately), the maximum fill volume for blending is 32oz.
Avoid overfilling any blending vessel beyond the designated "MAX" line, as this can lead to appliance damage and impact performance. Take a moment to familiarize yourself with the vessel's MAX line for precision.
For efficient blending, cut large ingredients into 1” or smaller pieces to prevent motor stalling. It's recommended to maintain a minimum of 25% liquid in the blending vessel for optimal results. Exercise caution by refraining from blending hot or carbonated ingredients. By adhering to these guidelines, you'll ensure a seamless blending experience while preserving the longevity and efficiency of your Splendor Blender.
Keep your Splendor Blender performing at its best by following these cleaning steps. Begin by separating all components. Wipe the blender base with a damp cloth and let it air dry. Hand wash the blade base with caution due to its sharp blades, either in warm, soapy water or on the dishwasher's top rack. Dishwasher-safe blending vessels and lids can be placed on the top rack as well.
You can also utilize the self-cleaning functionality by filling the blending vessel to the MAX line with warm water and a drop of detergent, pulse a few times, and rinse. Ensure all parts are dry before storing. Use a small brush, like a toothbrush, for stubborn food particles under the blades.
Pro tip: Prevent blender base staining by immediate wiping after contact with stain-prone ingredients. Staining doesn't affect functionality, but keeping it pristine enhances your blending experience.
The Splendor Blender is equipped with a safety system to shield its motor from potential damage due to overload or overheating. If the LED light flashes red, indicating a temporary motor disablement, follow these steps for a quick reset:
- Unplug the appliance and let it cool for approximately 15 minutes.
- If using the 750mL or 450mL blending vessels: Remove the blade base (for the Pitcher, remove the lid), empty the blending vessel, and ensure no ingredients are obstructing the blades.
- Verify that the maximum capacity hasn't been exceeded, a common cause of overload or overheating.
When dealing with tough or large ingredients causing blending interruptions, follow these steps:
For 450mL and 750mL blending vessels:
- Remove the vessel from the blender base.
- Shake the vessel lightly to free up contents.
- Optionally, remove the blade base, stir with a silicone utensil, or add more liquid.
- Reattach to the blender base to resume blending.
For the Pitcher:
- Remove the pitcher from the blender base.
- Remove the lid and stir the contents with a silicone utensil, or add more liquid.
- Reattach the lid and place back on the blender base to continue blending.
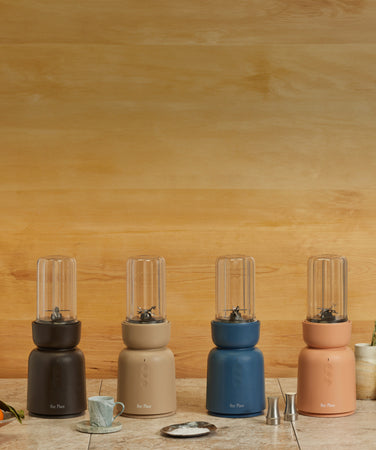
Enhance your Splendor Blender experience with our accessory kits, designed to cater to your diverse culinary needs. The core configuration includes the essential Blender Base, Blade Base, a 750mL Vessel, and a convenient Drinking Lid. For those on the move, consider the "Personal Kit," featuring an extra 750mL Vessel and Drinking Lid, ideal for crafting smoothies and taking your creations wherever you go.
Step up your kitchen game with the comprehensive "Everything Kit," comprising a 450mL Vessel and Storage Lid—perfect for crafting and storing dips, spreads, and sauces. Additionally, this kit includes a Pitcher, a generous 32oz blending vessel tailored for family-sized recipes and the safe blending of hot liquids.

